Today’s project: Save-the-Earth sandwich wrap
My Healthy-habits Friend will be proud of me – I’ve made an effort to be more environmentally conscious…which has had the side effect of helping the household wallet as well as the earth. Go two-for-one!
I send a lunch with my girls to school everyday, and I had made lunch totes for them before the beginning of the year as well as coordinating sandwich wraps. These replace the plastic bag that I usually stuffed their sandwiches into – cleaner and easier for my girls to work with.
I got the original idea from this book:
I have altered the piece from the original slightly… as I will explain as I go.
First, I made a pattern based on the measurements given in the book. Kind of. I had a 11x14 piece of paper, so I altered the measurements to fit on there. This just made the result slightly smaller – about ½ inch overall, I would guess. So that’s alteration number one.
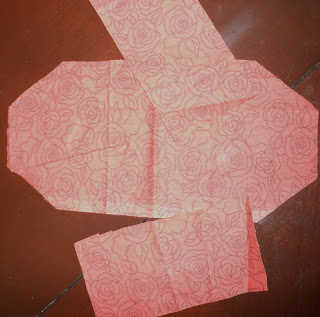
You have two pieces – one for the body of the wrap and one for the flaps.
Then I cut the pieces out of the two kinds of fabric. One for the body and two for the flaps.
The book asks you to use PUL fabric – this is a fabric with a plastic coating on one side and is used for diaper wraps and other things where you need waterproofing. Here’s the next change I made. I used a regular cotton fabric and the white is tablecloth fabric (you know, the kind of stuff that grandma had on her table for years), So, my pieces are double-layered while the one in the book is single-layered. My choice was purely motivated by cost – the tablecloth fabric was $4 for a yard (in which I have made 3 totes and 5 wraps and still have tons left), the colored is a fat quarter, for about $1; the PUL fabric is $14/yard or more.
From this point on, because my piece is double-sided, I’ve got several more steps than in the instructions of the book.
Next I sewed the two body pieces together, right sides together, but just on the ends:
Flip it right-side out:
Sew the flaps together, right sides together, on the two short sides and one long side:
Flip right-side out:
Here's the three pieces after sewing and turning:
Fold the unsewed edges in and finger press the open edge of the body piece:
Then pin the flaps into these pockets on either side of the body:
Top-sew all around the piece, attaching flaps to body:
The original piece has all sides of the wrap acting as open flaps – you essentially just place the sandwich in the center and fold up all the sides to close it in. I thought it might work better to make one of the flaps a pocket. I felt this would keep the sandwich together better and make sure that it didn’t slide all around inside the wrap.
I just arbitrarily tilted the one flap in a little, pinned and sewed in place:
Next, attach a piece of “Velcro”:
One on the inside of the end flap and one on the outside:
Here is it in action:
And here it is folding up:
I let the girls pick their own fabrics for the totes as well as the wraps, ending up with one tote and three different wraps. They have thoroughly enjoyed using them and they wash up very well – I’ve thrown them all in the washer and dryer without any shrinking or misshaping. I’m thinking about making something similar for carrots and other smaller treats…
The biggest treat from making these (other than the proud grins that my girls have while using them) is the NON-guilty feelings I have making their lunches! YAY for less guilt in the world! =)


No comments:
Post a Comment