Sunday, September 30, 2012

Today, September 30, 2012

Today’s project: Plastic bag upcycle

Previously, I’ve mentioned the over-abundance of environment-killing paper and plastic bags that populate our household.  Not because we don’t have those cloth ones (cuz we do…too many of them, in fact, because I’m the sucker who keeps buying one when I’ve left mine in the car) or because I refuse to use the cloth ones (I would use them, really…if I could remember to bring them in with me) or because I have some weird hatred of the Earth and am doing my part to slowly poison it with plastic bags leaching evil things in a landfill…BWAHAHAHAHAAAAA!  Ahem. 

Actually, it’s really just because I’m a dork and forget to bring them into the store with me.  That’s it.  Sorry conspiracy nuts.  Go back to your theories of nuclear weapon domination by New York cockroaches.

So, I’ve managed to dwindle the paper bag pile by a few with my organization box:

and my hat box:


But those pesky plastic bags were yelling at me. ‘Hey!  What about us?  We can be valuable too! NOT FAIR!’

I hear you, plastic ones!  Today you are vindicated!

It’s beginning to be fall here in Michigan and the trees are really showing some lovely fall colors.  Pretty reds, yellows and oranges.  This always puts me in the mood to decorate the house.  However, there is that issue of my cheap nature and limited resources.  Pishaw! I scoff at you, limitations!  I will show you – I will make a fall wreath out of a wire hanger, plastic bags and flowers from the dollar store! BWAHAHAHAHAHAAA!  Ahem. 

Maybe I shouldn’t listen to ‘Dr. Horrible’s Sing-A-long Blog’ while I type my entries.  Hmmm…NAH!


I originally got this idea from something I saw in a magazine a couple of years ago (I tried to find it on their website, but didn’t have any luck…sorry…there’s one for you, conspiracy nuts.)  They used sandwich baggies for their version.  I did once and I think it turns out really pretty and is great for a winter wreath; it kind of sparkles.

Of course, I didn’t have a bunch of sandwich baggies lying around…but guess what I did have a bunch of lying around? 

Since I wanted to make a fall wreath, I used the brown bags; I have several white ones too, that I think I will use for a winter/Christmas version.  Or maybe I’ll use those for something completely different!  See?  I’m un-pre-dictable!

So…yeah…here’s the bags:

Step one:
Take apart the wire hanger:

And form it into a circle:

Step two:
I cut apart one bag into two pieces:

And then tie each piece onto the circle:

Step three:
Repeat step two about a gajillion million times:


Make sure you really fill in the wire form – this makes the best look over all, I think.

Step four:
Got these from the dollar store:

And then glued them strategically on the wreath:

Here it is in action:

That’s it.  I’ve got about 30 less plastic bags in my garage and a pretty cool wreath on my door.

Now, if you will excuse me, I need to get back to building my bunker in the back yard for when the evil cockroaches have their uprising and nuke us all….

 
Pic: getitbyte.com


Saturday, September 29, 2012

Today, September 29, 2012

Today’s project:  Blog Catch-up

This is a double-hitter blog.  Yesterday, my project ended up being more involved than I thought it would be and kept me up until about 1:30 am.  Here it is, already the next day and I’m beat, so I decided both you, dear reader, and I would be best served by Rora heading to bed.  I mean, have you ever had those late night giggle-fests with your friends where you all think you’re brilliantly hilarious - like you should all be given high-paying gigs writing this stuff down for Saturday Night Live or David Letterman – where you are all wishing you had a tape recorder to preserve the frivolity for all time?  And then the next day looking back, you are grateful you didn’t make any kind of permanent record of that stupidity.

I thought that I would spare all of you that.

You can thank me later.

Yesterday’s project: Use that second wind!

I had different project planned for yesterday (which I will probably do tomorrow, so don’t change that channel!)  I got distracted by playing with Steampunk…which is generally what happens when I start playing with Steampunk. O, dear Steampunk, you glorious, glorious distraction. Sigh.

Today, I was due to deliver my previous projects of the commission Steampunk costumes to my client.  Therefore, last night, I was taking some time to get the items together in a presentable form – putting them on hangers, covering them with garment bags, etc.  I had previously purchased a suit coat, intending to alter it for my client by adding length or gears or whatever.  I didn’t have a great plan when I bought it, but I usually don’t, honestly.  I often buy pieces that have good ‘bones’ knowing that I’ll find a way to make them work for my needs later.

Here it is:

Just a plain ol’ suit coat.  It didn’t have pants, but that suited me just fine.

No pun intended. Sheesh. What a groaner.  I apologize.

My client does, indeed, want me to make a coat for him, and I will be working on that over the next couple of weeks. I thought that I would play with this suit coat for a little bit and then show it to my client as a ‘what do you think of this idea?’  It can’t hurt, I think, to have some extra options when attending a conference or event; to account for weather, comfort, the particular event (whether it’s formal or informal), etc. 

My intention last night was to pin a few things on to just suggest what I might do with the piece; something for my client to see so he could better visualize where I might go with it.  I used a fabric I had purchased earlier; a faux suede with a sort of a snake-skin pattern.

A pin here, a bit of fabric there. The next thing I knew I had pinned on the majority of what could be a completed piece. 

Then I thought, ‘Well, I’ve got it all pinned, maybe I should sew a few of these bits on.’ I wanted my client to be able to try the coat on and I didn't think that stabbing my client with a whole bunch of pins like he's some kind of giant voodoo doll probably wouldn't be the best idea. 

And then of course, the next logical conclusion, ‘If I’m going to sew these bits on, I might as well sew all the bits on.’

Which lead to, understandably, ‘Ok, I’ve sewed those bits on, I might as well finish the thing with changing the buttons and sewing on some embellishments.’

With one thing and another, it was suddenly 1:30 am.  BUT I had a magnificent piece to surprise my client with. And then the praying began…as I hadn’t actually had my client try the jacket on, so I wasn’t sure it would even fit (although I did do a couple of tricks to make sure my odds were better).
Enjoy the result:
Front...
Back...
Details - GEARS!!!!
more details...


I must say, I feel as if I have done some of my best work EVER on this project, including the previous pieces.  I am particularly proud of the way the jacket turned out and my client said he was quite happy when I presented him with the completed costumes today.  And every thing fit like a glove, looking FABULOUS!  He’s promised to take some really nice pics and send them to me. So be looking for those in the future, Steampunk enthusiasts!

I’m sure you’re asking yourself, “Why is this project titled: ‘Use that second wind’?”

Well, Pushy, I’ll tell you.  Some people (in my brain) are so demanding!

As I said earlier, I had a totally different project planned but as I was starting to get my stuff together to work on it, I found myself feeling a bit run down and tired.  ‘Oh boy,‘ I thought, ‘I’m going to have to kick me in the butt to get this done. Poo.’

That is when I decided to give myself a bit of a distraction by playing with the jacket.  As soon as I started to play with the piece I found that I suddenly had a ‘second wind;’ which is, of course, how a second wind works.  Just when you think you are totally done in, a burst of energy seems to come out of no where and you are off and running again.

Now, I’ve had enough experience with gaining a ‘second wind’ to not ever let it go to waste.  Oh no, I’m going to use the crud out of that energy.  Like a French whore at a sailor convention.  Like a 8-year old sewing moo-moos in a Kathy Lee Gifford sweatshop.  Like a one-legged man in a butt-kicking contest. 

That’s right, that ‘second wind’ will not escape my clutches…

BWAHAHAHAAAA!!!!

Maybe I should have put myself to bed early tonight.... How do you erase this tape?

Thursday, September 27, 2012

Today, September 27, 2012

Today’s project: Motivation

I didn’t do what I wanted to do today.  Because today, I wanted to wallow.  In bed. In self-pity. In guilt. In a bubble bath. Wallow, wallow, wallow.  Like a big fat pig in the middle of a soggy summer day.


Yesterday, I had a stupid migraine in my stupid head. Stupid stupid.  Leading to me not doing the things that I had scheduled; two of which were helping out friends.  And when I can’t help out like I said I would, I feel like a giant waste of a friend.  I truly was incapacitated for the majority of the day, but it didn’t stop me from filling my head with lovely guilt-ridden imaginings about just how angry my friends are with me; if they still want to be my friend, that is, after being so intensely let down by me.

Guilt-wallow.

Today, in between trying to decide if I should send the large or the extra-large apology bouquet to these friends, I’m having a conversation with myself about my lowly state of job-less-ness.  In this economy, what’s a highly-skilled, intelligent, college degree-minus person supposed to do?  Then I spent a good 30 minutes scrounging around in the couch cushions for a dollar in change so I could buy the winning Lotto ticket that will solve ALL my problems.

Self-pity wallow.

“They” say I have to shower every day.  Don’t smell, blah, blah, blah… Isn’t a giant bubble bath for two or three hours just as effective?

Bubble bath wallow.

That’s what I wanted to do. Yep. Be a lazy, useless freak eating chips and watching Jerry Springer.  Feeling my butt spread a tiny bit more with every push of the button on the remote control.

But as my mom is fond of saying, “People in hell want ice water, too.”  Gotta love nuggets of wisdom from your parents.  That one is on my list of favorites.  I’m looking forward to the time I get to pass it on to my children.  I'm just waiting for the best moment; it’s not an adage you want to waste on any ol’ whining tantrum.

So, even though I’m an adult and can make my own choices and no one would care if I was lazy today and blah, blah, blah - you know, all those things that we say to justify our actions when we opt to do (or not do) things that we should/shouldn’t – I made myself find some motivation and come up with a project for today.

I actually have a whole random list of projects that I could pick from, but the Wallow Monster wouldn’t even let me look at that piece of paper.

Fortunately, I had an idea yesterday that I was able to do today.  Take THAT Wallow Monster!  I thwart you with a dose of MOTIVATION!

Please note: possible side effects of motivation include – running all over the house like a chicken with no head because you have several different projects going at once – needing to take a break because you are out of breath from running up and down the stairs from forgetting and re-forgetting all the tools and supplies needed for said projects – distraction from things you actually needed to get done today because you are too focused on completing aforementioned projects.

Anyways…

I have several items from previous Steampunk adventures that I’ve started going through in anticipation for upcoming adventures.  I was annoyed to discover that one of my treasures had gotten mashed a bit because someone (meaning a person who looks a lot like me) put it in a bin with a bunch of other treasures and it got jostled. I have got to have a word with that person about being more careful with things. Ahem.

This particular item is a hat – or a head piece, I guess.  Here it is:

I decided it would be cool if I stored my Steampunk hats in hat boxes.  I looooovvvveee hat boxes.  They are such a neat item that I wish we still used for their original purposes.  Now, you can buy decorative hat boxes at just about any craft store or department store. They are an ‘in’ item and come in lots of patterns and styles.

But, of course, they cost dollars…and I’m cheap…and I have all those pesky paper bags.

So I made this:

Spoiler alert – HOW-TO FOLLOWS!

I ‘measured’ the hat and cut the top off of the bag and formed it into a tube.  This forms the body of the box.


For this project, you will see, I used mostly masking tape.  For paper to paper projects, I like masking tape a little better than duct tape. Sneak craft tip:  I found that taping all the way around the edges of the tube made for a much stronger structure overall.
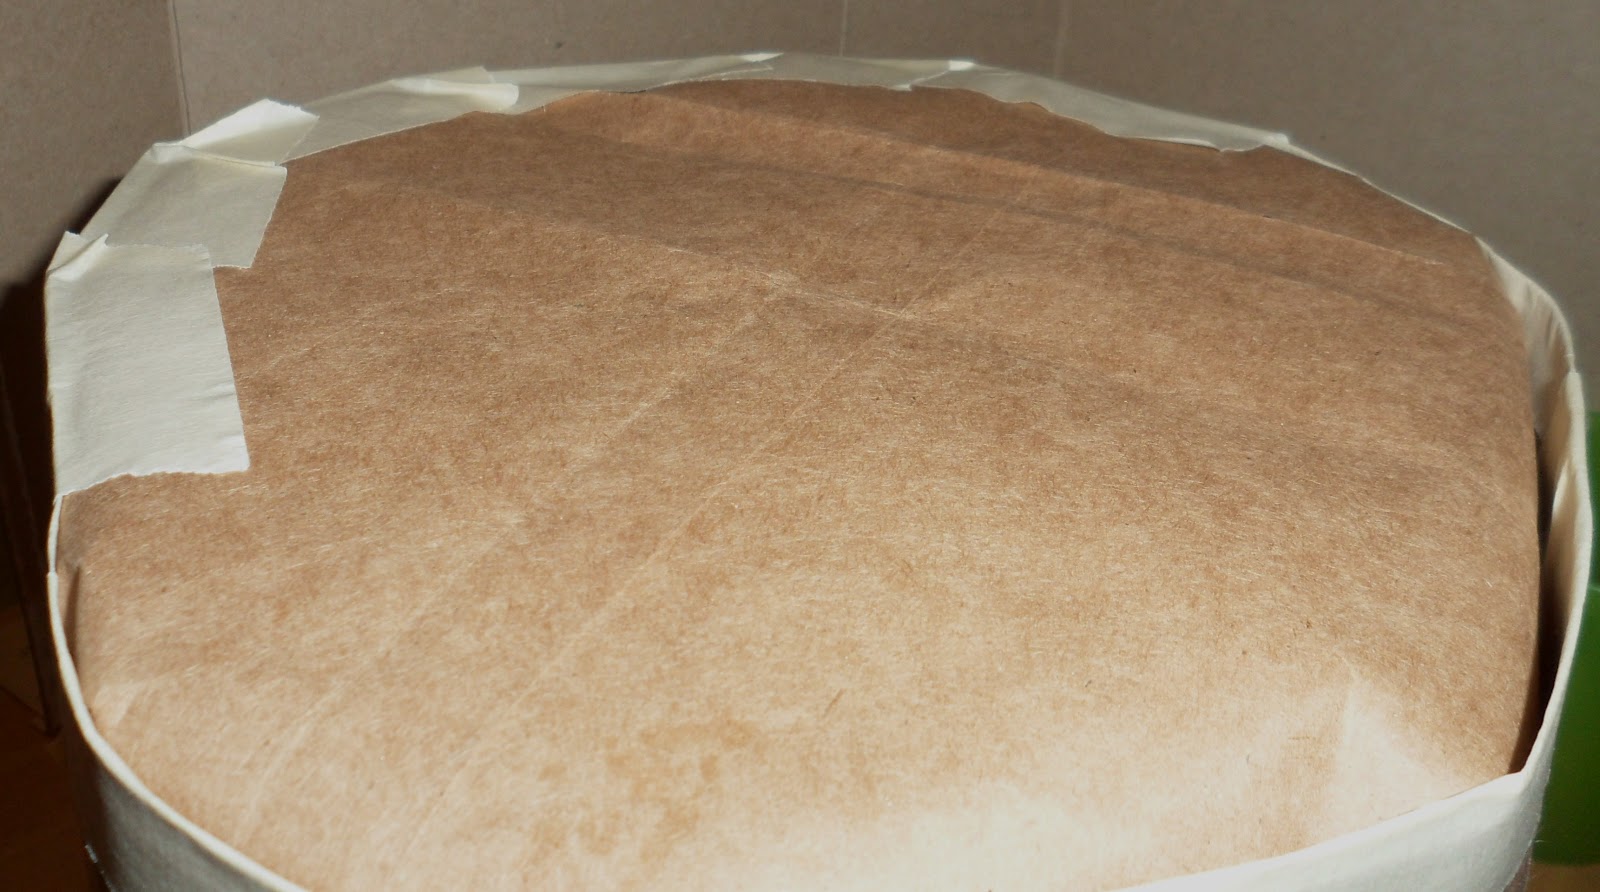
Using the rest of the bag, I cut a circle for the bottom of the box.

The body of the box was my guide, and I made a little ‘jig’ for measuring out of a piece of masking tape.

Then cut down to the line all the way around and folded it up to give myself something to tape to the tube.

I taped it on the outside too, to give it more stability.


I didn’t think that the paper bag would be strong enough on its own to be effective as a protector for my hat, so I cut up a cracker box…

Formed a tube…

and put it inside the box, taping it down on the walls.


What I have so far is pretty durn ugly – that will never do!  Scrapbook paper it is!

Covered the outside of the box with three pieces…


Now for the lid – Still have some paper bag left over; another circle for the base of the lid and cover the middle with coordinating scrapbook paper.

Using the same method as the bottom, cut slits to the middle and fold it to form the edges of the lid.

Cover in masking tape for some extra stability

Hey, that’s still ugly – cover that!

Um… we need to cover that tape edge there…left over ribbon from Bella’s Birthday Bash? Don’t mind if I do!

This time I used hot glue.  It has a more solid stick and doesn’t show.

We need a handle of course!  I took two pieces of the ribbon and glued them back-to-back so that I ended up with a double-sided ribbon.


Punch a hole in the side of the box, thread the ribbon through and secured it with a dollop of glue on the inside.

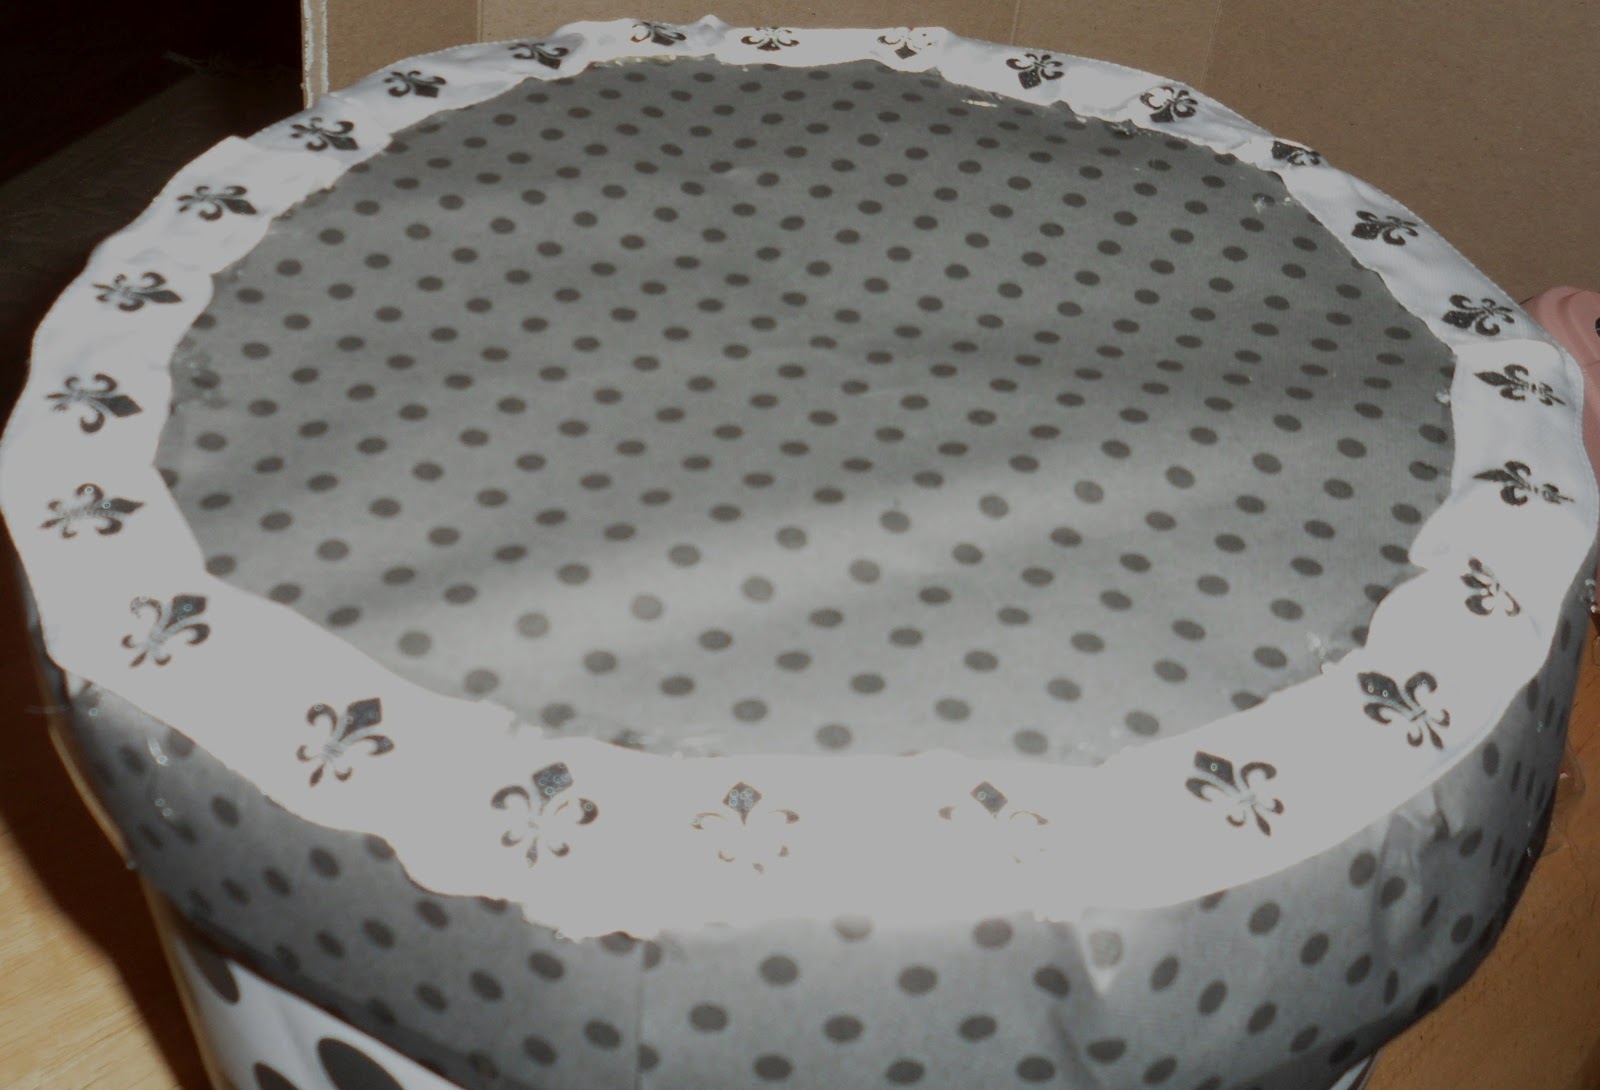
Hey! Now the outside is pretty, but the inside needs help. 
I didn’t have any black/white paper left, so I chose a cute pink instead.  Make a tube and cut a circle, glue it down and we are all set!

Here is the finished box housing my hat – happy hat in its new home!

Well, there we are.  I did something today.  YAY!

But mostly, I’m proud of what I avoided rather than what I completed.  I avoided being overwhelmed by the Wallow Monster, but I also avoided the Guilt Gremlin and the Self-Pity Pooper! And I managed to create a feeling of accomplishment in addition to a little hat box. 

I am definitely Super-Hero Mommy today!  Smashing evil psyche villains in a single craft!


Wednesday, September 26, 2012

Today, September 26, 2012

Today’s project: Victorian pocket photo

Although my entrance in to the world of Steampunk has expanded my love of the Victorian era, I’ve always had a fascination for the time period; the clothes, the society, the sentiment.  I have several books dedicated to this specific era in costuming.  Whenever I’m flipping channels and I see something from that time, I immediately stop and am bewitched until it is done.  I’m sure I look a lot like a little kid watching cartoons on Saturday morning.

I love to watch PBS, the History Channel and the Discovery Channel.  They have such glorious documentaries on all kinds of subjects.  The other day, it must have been ‘civil war’ day on PBS because they played three fascinating pieces in a row.

My favorite was on the role of death in America and specifically how the Civil War completely altered how we, as Americans, dealt with death.  I KNOW it sounds super morbid, but it really was enthralling.  I never realized that we didn’t, as a country, have any provision for caring for the dead before the Civil War.  It was a private matter; a responsibility always taken on by the family of the deceased.  However, with the sheer number of soldiers who were killed, the government was entreated to develop some kind of plan.

Because of the daunting task of identifying and burying all the poor boys and men, things we take for granted now were devised.  Like dog tags. And National Cemeteries. And Memorial Day. 

If you want to have your heart touched to the core, research the “first” Memorial Day.  It was an amazing story, I’ll not soon forget.

ANYWAYS, all of that is relevant because something that was common in the Victorian era was an inspiration for today’s project.  And this particular item was shown often in the documentary.  I’m not sure what its official name is, but it is a small framed picture usually clad in a leather case.  It was made to be carried in a pocket and many, many soldiers on both sides brought them to the front lines so they could have a reminder of loved ones to look at when lonely and homesick.  It was the one thing they demanded near them when times were tough and the one thing they kept safe. Here are a couple examples:

I thought this was a charming idea and wanted one of my own.  But of course, I’m cheap and I thought, ‘I wonder if I could make something like that…’

Originally, I wanted to use a business card case – something like this:

However, the ones that I found were rather expensive and had a weird little lip on the one side; which is great for keeping cards tidy in the case, but not so great for housing a picture and photo mat.

Then, at Office Max, I found this:
YAY PLEATHER!
This was great; it was only $2 and seemed very simple to convert to what I had in mind.
Step one:
I cut the little pockets off that hold the cards in.


I wanted the gilted mat look of the example.  That is what gives it the ‘Victorian’ feel, I think.  Step two (make the mat):
Using an old pasta box (wink to my Healthy-Habits friend – see I’m recycling!), I cut out a little rectangle of cardboard.

Then I cut out an oval from the center, so the photo peeks through.

Here is how I got the ‘metallic’ look.  I went to the hardware store and got some foil tape.  I’ve used this before and I LOVE it! You can find it in the section where they sell the air duct stuff.  It’s great stuff because it has the feel of real metal, but is thin enough to really manipulate and wrap around where you need it.  Using two strips, I covered the cardboard.

Cut from the center of the oval to the edge making several wedges. 

Fold these back to expose the open center.

I used a pencil to draw some swirlies and such on the mat.  I had some pieces for reference, but really I just free-handed it.

Then I did a second one.

I printed off pictures that I wanted to use, making them close to the size I needed.

Next, I wanted to make sure the pics were protected, so I used the plastic wrap from some stickers I bought and cut it to be a hair larger than the photo. More recycling - WHOO HOO!

Make a sandwich of the mat, the plastic coating and the pic, and then glue it onto the card holder.

For the gluing, I used E6000 glue rather than hot glue, which is my usual go-to fastener for projects.  I love hot-glue for its quick drying nature, but the E6000 makes a much stronger, long-term bond.  It takes quite a bit longer to dry, so be sure to leave it some where undisturbed for at least overnight.

Here’s how I used the stickers I bought:

It’s stuck to a piece of blue scrapbook paper and then I glued that to the front.

The completed memento:

Here is another version I did:
In this one, I used some plastic ‘window’ things I found at Office Max that are intended for scrapbooking.  The colored background is actually the cardboard from the package that the plastic thingies came in.  I cut the one down a little since it was too big and put the sticker on the other side.

So that’s it.  My silly craft for today is a little pocket frame to give me something to look at when I’m missing my beautiful girls…and I can totally understand why those soldiers back in the Civil War coveted theirs.  I know I will treasure mine.