Today’s project: Paper bag face-lift
I really have the best of intentions when it comes to being ‘green’. But, frankly, overall I’m failing miserably. I toss piles of plastic bags. I never recycle tin cans. And I always, always forget to take the plastic pop bottles back to the store. It gets to the point where I give them to my friends. ‘Here. You take them. You can have the money. Just get this bag of guilt out of my house please.’
I have some great friends who faithfully sort out empty bottles, newspapers, and Chinese food containers to either reuse or recycle. Their curb looks like a little shrine to Earth Day every week with recycling containers full or overflowing for the trash collectors. They are wonderfully able to rinse out glass spaghetti jars and Ziplock bags to fill with other stuff and always, always seem to remember to bring those cloth bags to the grocery store; bags that are meant to replace use of paper or plastic bags. You know, the ones that are displayed right at the check out and seem to be there merely to make the rest of us feel guilty for slowly killing the earth with our piles of plastic bags.
I have a real problem remembering to bring those bags in with me when I shop– even though I have probably a dozen different ones; ones that condense and fit in my purse, ones that hold several others, from various stores. There is even a stash of them in my car…right in the passenger seat. I really can’t fail to see them, and yet, every time I get to the checkout I do a mental ‘smack-to-the-forehead’ as I have forgotten to bring those silly bags in with me. Again!

For a while, to make myself feel a little better, I asked for paper instead of plastic. This gave me two results: 1. The checkout baggers will usually fill these bags a little fuller, so you end up with fewer bags in the end; and 2. I convinced myself that I could use the paper bags for other things more easily than the plastic bags. And I do, really. For example, I use the paper bag as a trash receptacle for my sewing projects; it’s a great choice because it is free-standing and functions much like a regular trash can would, but when it gets full I can toss the whole thing.
Unfortunately, the uses I have for them weren’t using them up as quickly as I thought and I ended up with a whole pile of paper bags. And, of course, I don’t take those back into the grocery store any more often than the cloth bags, which would be the ideal use for the dang things.
It occurred to me: why don’t I come up with as many ‘other’ uses for either paper or plastic bags as I can? That would be a cool project idea! AND my Healthy-Habits Friend will give me a little pat on the back…and then berate me for throwing away those veggie cans. I know, I know. But baby steps are still steps, right? Ahem.
I’m planning on posting all the different ideas I come up with using the bags. So, here’s idea number one: storage 'box'
As much as I love office supplies, I also have a weird obsession with organizational tools. I loooooove labeling and color-coordinating things into cute little containers. Nothing makes me happier than seeing a well-ordered stack of items looking back at me when I open a cupboard or drawer. Unless it is a well-ordered stack of office supplies…ooooooooh….pardon me a moment, I need to find a tissue to wipe the drool off of my face.
Anyway, I’m always looking for containers to put my ‘toys’ and things that I use for creating and such. But, I’m pretty cheap, so I don’t like to spend the $10-$20 those things usually cost. I mean, tissues are inexpensive so I allow myself all the drool I can handle while shopping, but the actual purchasing is an issue; for me and for my wallet.
What’s a savvy mom to do?
Then I thought of my paper bags…hmmmm…wonder what I could do with those to make some kind of container for my ‘Correspondence Club’ supplies? I like to kinda travel around the house with my different projects; today, I might want to sit at my desk in the library, tomorrow, I might want to be on the couch, or in my bed. So something that is kind of mobile but will contain all the things I might need in one spot would be ideal. Here is the result:

It occurred to me that if I rolled the top of the bag down, it would reinforce the sides as well as look really cute.

As I was doing this, I realized that it works the best if you let the bag kinda crumple in on itself and then straighten it out after it’s rolled. It prevents the bag ripping as you go.

After I had it rolled, I tested it with some stuff and realized that it was not very strong on the bottom. If I put any kind of real weight into it, it would kind of sag, and I thought this would not be conducive to keeping the items inside from sliding around or falling into each other.
Bring in a second bag! Hey, I’ve got plenty, and using two for one project seems like a super great way to make that pile shrink even faster. And to make my hubby do a fist-pump in the air for the crap-pile shrinking and for that craft-pile to be wrangled. I’m all about making my sweetie happy. =)
So I cut the bottom off of a second bag, using the first bag as a guide to how much I should cut off. I wanted it to be the same height as the rolled bag, to the top of the roll.

Then I cut the top off of a cardboard box we had leftover from Bella’s Birthday to make the bottom and sides even more solid.

Sneaky crafty tip: A serrated steak knife works so much better than any other type of tool I’ve used to try and cut cardboard. It slides through the material really easily and doesn’t tear it up on the top and bottom like other knives and scissors tend to.
I duct taped (YAY DUCT TAPE!) these side pieces to the bottom. I was hoping this would make sure parts didn’t shift around inside the ‘box.’

Now, slide the cardboard bit into the second, cut bag and then slide the rolled bag into that bag. Things fit pretty tight, so it didn’t need anymore tape or anything.
Handles. It has to have handles. I want to carry it around, after all. I decided to do two handles so that they would fall to the side when not in use and give me the most access to the ‘box’ when not being carried.
Back to the duct tape. YAY! BEST INVENTION EVER! You will see me use this handy-dandy item for lots of silly crafting stuff. It is great because it can add some real heft to whatever you use it on. Additionally, it seems to be a trendy craft supply right now as you can buy it in craft stores, regular stores, office supply stores as well as the good ol’ hardware store. It also comes in a lot of crazy patterns and colors. This is what I had lying around the house already, so that’s what I used.
Taking two strips that are the same length, then put them sticky-sides together…

then cutting it down the center…

Hmmm…I have some pretty ribbon leftover from Bella’s birthday party decorations…what to do with that?

Punch a hole in the duct tape strips, and poke matching ones through the bag and cardboard sides, then use the ribbon to tie it all together.

I wrapped the ribbon through the holes twice and came back out again so that it is pretty solid on both sides; inside and outside.

Sneaky craft tip: I used a piece of masking tape on the end of the ribbon to make a hard tip to push through the punched holes. So much easier.
It’s done, right? NOOOOOO!!! Silly mortal! Rora can NOT leave well enough alone! BWAHAHAHAHAAAAA!
Ahem.
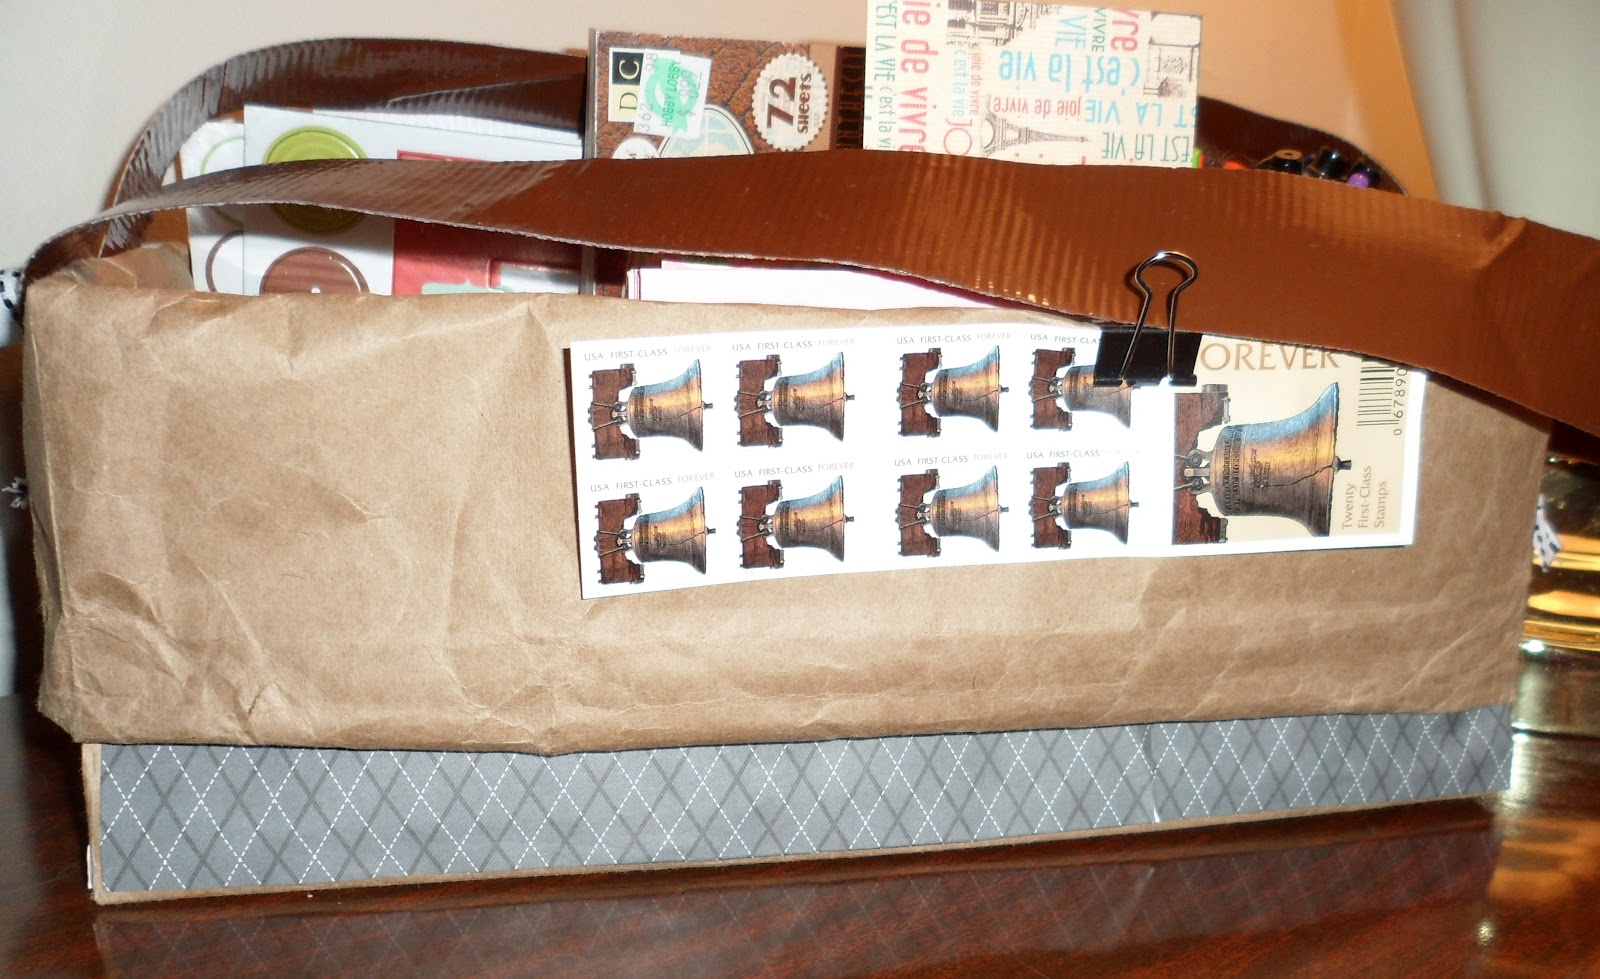
I decided it looked kind of plain, so I added some scrapbook paper along the bottom, to help tie into the ribbon colors. It fit pretty snuggly on the top just sliding it under the roll, but just to be safe, I glued it along the bottom.

Now for the stuff on the inside.
I wanted a cup for my pens and such, but didn’t want it to be just any ol’ cup, of course! We have several plastic cups that were originally for the kids; they have a bunch of images of princesses and superheroes and other things that don’t really go with my ultimate ‘mom style’. Scrapbook paper to the rescue! I taped a coordinating paper around the outside of the cup. That’s it! Instant make over! Whoo hoo!

If only that worked on my cellulite. Sigh. Do they have flesh-toned scrapbook paper I could tape on my butt? WAIT, I know! DUCT TAPE!
Here is the completed ‘box’ filled with stuff:

Here is my model, the wonderful Bella, showing it in action:
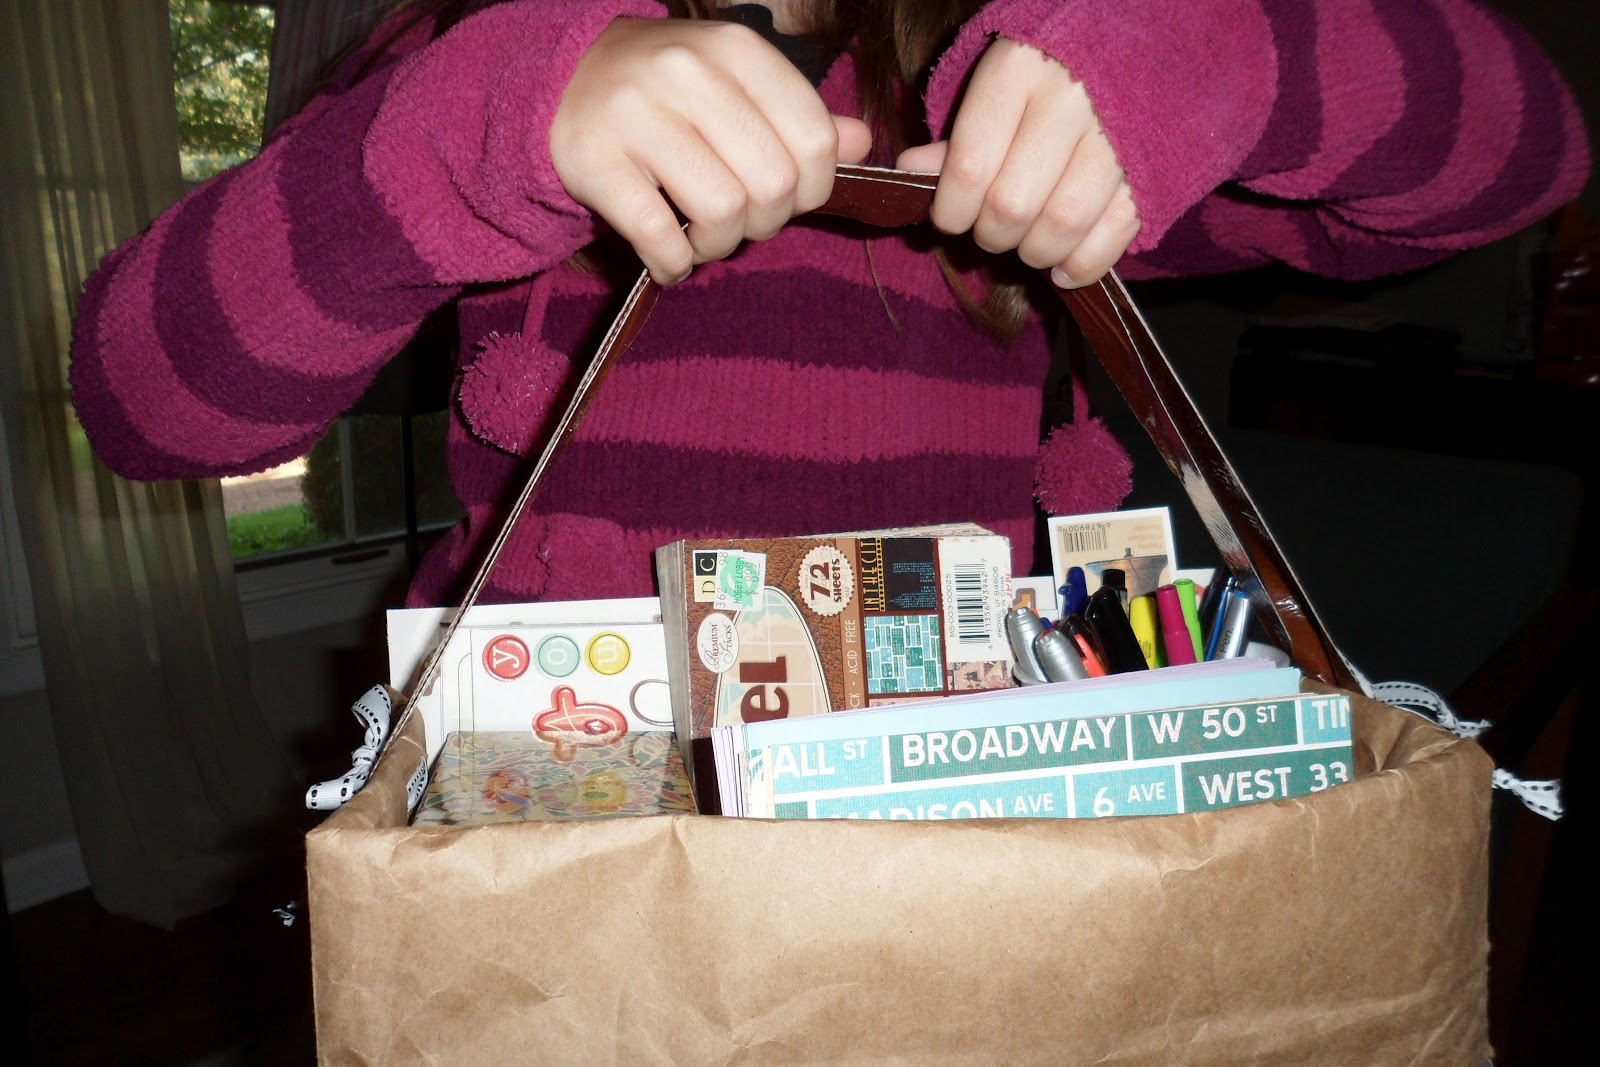
There it is, dear reader, the paper bag organization container. I feel like it was pretty successful. I used it all day to cart around my stuff and didn’t feel like it was in any danger of falling apart or shifting the items too much.
I LOOOOOOVVVEEE it when my ideas actually work. Because there is always a point in the middle where I’m not sure it is going to do anything but be a big, crazy mess that makes me cry.
Which can be both a good thing and a bad thing. It makes me happy that I created something that actually is functional and kinda cute. But it also turns me into a slightly psycho chick who is looking at every piece of trash to see how I could save it from garbage hell buy turning it into something else. Rather like Dr. Frankenstein at a discount body parts store. BWAAHAHAHAHAHA!!! IT’S ALIVE!!!!
Fortunately, I have a whole pile of paper and plastic bags that are just waiting for me to break out my lab coat and a pair of forceps.
Now if I could only find a hunchback to function as my assistant/minion….
 Oh, sweeeeetiiieeee...
No comments:
Post a Comment